The most common question we get on EV charger estimates in Naperville isn’t about the charger itself. It’s: “Do I need to upgrade my panel?”
The honest answer: sometimes yes, sometimes no, and you can usually figure out which camp you’re in before we ever show up. This guide walks you through how to assess your own panel — what to look for, what to measure, what’s a deal-breaker, and what’s manageable. By the end, you’ll have a pretty good idea whether your install is going to be a clean half-day job or a panel-upgrade-plus-charger combo project.
A note before we start: nothing in this guide requires you to touch anything inside your panel. You’re going to open the door (the outer cover), look, and write things down. You’re not pulling the dead-front cover, you’re not testing voltage, and you’re not removing any breakers. If at any point you’re not comfortable opening the panel door, stop — we’ll do the assessment for free during a site walk.
What you actually need to know
A Level 2 EV charger pulls somewhere between 24 and 48 amps continuously while charging, depending on how the charger is configured. The dedicated circuit feeding it has to be sized 25% above that — so a 32-amp charger needs a 40-amp circuit, a 48-amp charger needs a 60-amp circuit. That’s per NEC continuous-load rules.
To add that circuit safely, your panel needs three things:
- Enough total service amperage to handle the new load
- A spare slot (or pair of slots) for the new breaker
- Acceptable panel condition — meaning it’s not one of a handful of brands that need to be replaced regardless of EV charger plans
Let’s go through each.
Step 1: Find your panel and open the door
In most Naperville homes, the main panel lives in one of three places:
- Basement utility room (most common in homes built 1970–2000)
- Garage interior wall (common in newer builds, 2000+)
- Hallway or laundry room closet (occasional in older homes near downtown)
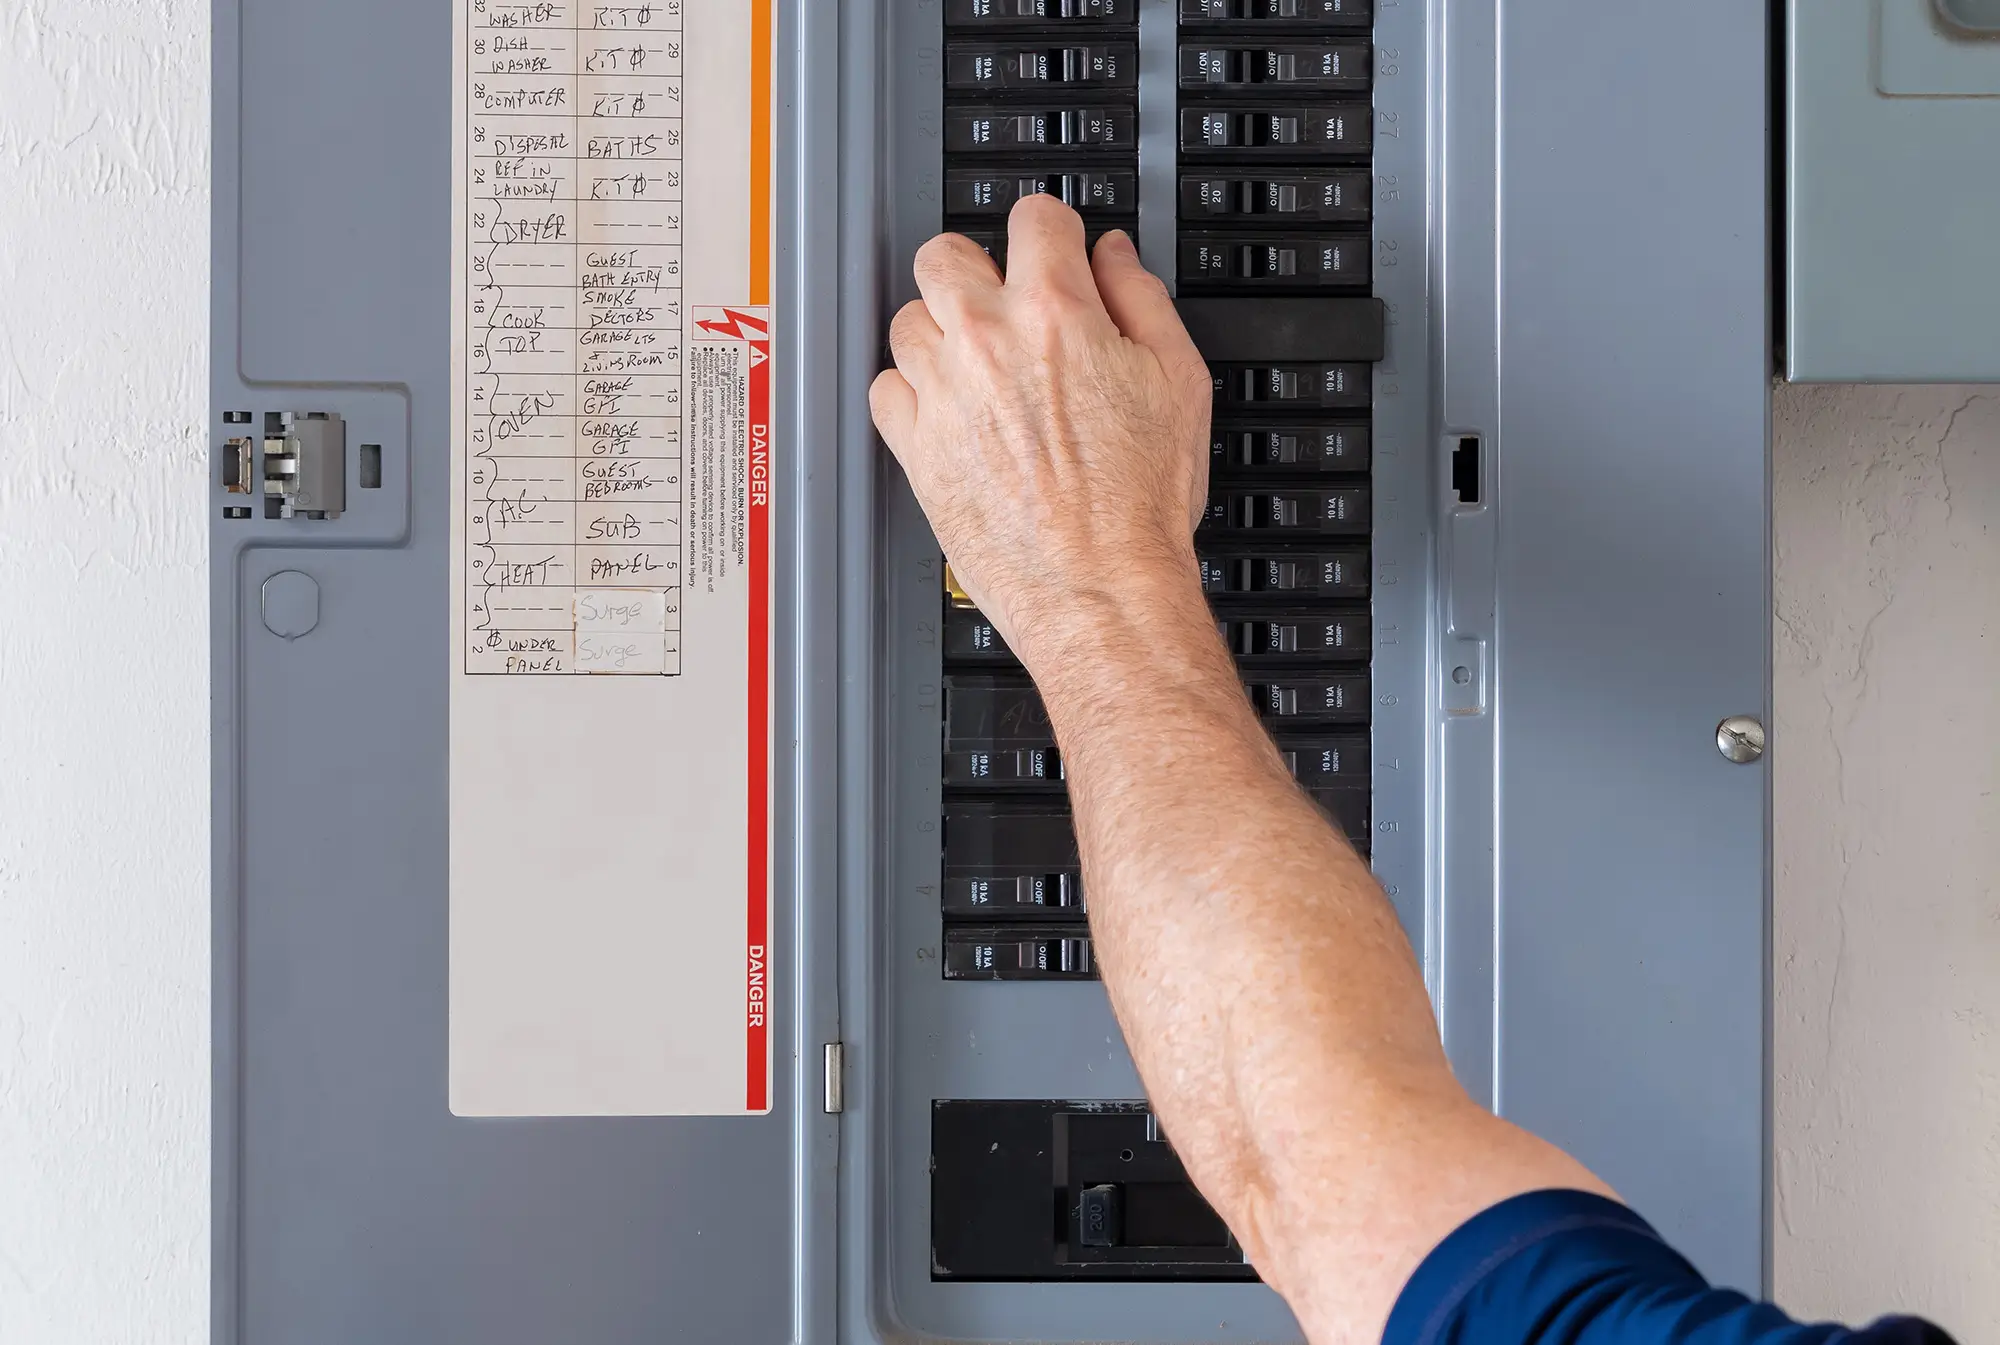
Open the outer door of the panel. You’ll see a grid of black switches (breakers) and a metal “dead-front” cover with rectangular slots cut for each breaker handle. Don’t remove the dead-front cover. Everything you need to assess is visible without removing anything.
Have a flashlight, a phone for photos, and a pen and paper.
Step 2: Identify the panel brand
Look at the panel itself — the inside of the door usually has a label, and the dead-front cover often has a brand stamp. The brand matters, because some brands need to be replaced before any new circuit gets added, EV charger or not.
Brands that are fine to add an EV charger circuit to (with capacity available)
- Square D (QO or Homeline) — the workhorse. Reliable, breakers are still in production, easy to add to.
- Eaton / Cutler-Hammer / Westinghouse (CH or BR series) — good panels, well-supported.
- Siemens — modern, reliable, breakers readily available.
- GE / ABB — fine for the most part. Some specific older GE breakers have known issues but the panel itself is OK.
- Leviton — newer in residential, fine for new circuits.
Brands that should be replaced before adding any new load
- Federal Pacific Electric (FPE) Stab-Lok — found in many Naperville homes built 1960–1980. There’s a long-documented failure rate where breakers don’t trip on overload. Insurance carriers increasingly refuse to renew policies on homes with FPE panels still in service. You shouldn’t be adding an EV charger to one of these — you should be replacing the panel as part of the EV project.
- Zinsco / Sylvania-Zinsco — similar story to FPE. Known breaker failure issues. Replace before adding an EV charger.
- Pushmatic / Bulldog — older panels (1950s–1970s), often undersized and difficult to source breakers for. Plan on a replacement.
- Challenger (some series) — has a recall history on certain breakers. Not always a hard replacement, but worth flagging during the site walk.
If you see “Federal Pacific,” “FPE,” “Stab-Lok,” “Zinsco,” or “Pushmatic” anywhere on your panel, your EV project is probably going to include a panel upgrade — and that’s actually good news, because you were going to need it eventually anyway, and bundling it into the EV install is more efficient than doing it as a separate job later.
Step 3: Find your service amperage
The total amperage your service can handle is printed on the main breaker — the single biggest breaker, usually at the top or bottom of the panel, often labeled “MAIN.” It’ll have a number stamped on the handle:
- 60 or 70 — Pre-1960s service. Almost certainly needs a full upgrade. Not enough capacity for an EV charger plus modern AC, dryer, range, and water heater loads.
- 100 — Common in Naperville homes built 1960–1995. Can sometimes handle a Level 2 charger if other loads are modest, but in most modern households (with AC, electric dryer, range or oven, microwave, dishwasher, etc.), you’re at or over capacity already. Most 100-amp homes need a 200-amp service upgrade for an EV charger install.
- 125 or 150 — Less common in Naperville housing stock. Sometimes possible to add an EV circuit; depends on existing load.
- 200 — Standard in most Naperville homes built 1995 and later. Almost always able to handle an EV charger circuit, often with no panel work required.
- 400 — Larger custom homes, mostly post-2005 builds. No capacity issue.
If you can’t find the number on the main breaker — sometimes it’s worn off — your service amperage is also listed on your meter or your ComEd bill. The ComEd customer service line can also tell you.
Step 4: Count empty slots
Look at the breaker grid. Each rectangular slot in the dead-front cover that’s covered by a small plastic filler (a “knockout”) instead of a breaker handle is an empty slot.
For a Level 2 EV charger, you need two adjacent empty slots (because EV charger breakers are double-pole — they take two slots side by side). Count them.
- Two or more adjacent empty slots: Good. The new breaker can go directly in the panel.
- One empty slot, plus one occupied by a circuit you don’t need (rare): Sometimes solvable, but that’s a conversation during the site walk.
- No empty slots, or only single non-adjacent empty slots: You’ll need either tandem breakers (only works on certain panels, and only certain slots), a sub-panel, or a full panel replacement.
A panel that’s “full” doesn’t automatically mean a panel upgrade — sometimes a sub-panel installed near the EV circuit is the cheaper path. We figure that out during the site walk.
Step 5: Estimate your existing load
This is the trickiest part of self-assessment, but you can get a rough sense by listing your home’s major electrical loads and totaling their amp draws:
| Load | Typical amp draw |
|---|---|
| Central AC (3-ton, common in Naperville) | 25–35 amps |
| Electric clothes dryer | 24 amps |
| Electric range / oven (full-size) | 32–40 amps |
| Electric water heater | 18–22 amps |
| Hot tub (if present) | 40–50 amps |
| Pool equipment (if present) | 20–30 amps |
| Microwave (dedicated circuit) | 12 amps |
| Dishwasher | 8–10 amps |
| Garbage disposal | 6 amps |
| General lighting + outlets | ~20–40 amps total |
| Sub-panel (if present) | listed on its own breaker |
NEC has a specific load calculation method, and your installer will run the formal numbers — but if your major-load total is already pushing close to your service amperage, adding a 40-amp EV circuit is going to put you over. That’s the moment a panel upgrade enters the conversation.
A rough rule: on a 100-amp service in a fully-electric Naperville home (electric range, dryer, water heater, central AC), there’s almost never room to add a Level 2 EV charger without upgrading. On a 100-amp service with gas range, gas dryer, gas water heater, and a smaller AC, sometimes there is.
Step 6: Decide which camp you’re in
Walk through the four checks and figure out where you land:
Camp 1: Add a circuit, no panel work needed
- ✅ 200-amp service (or larger)
- ✅ Square D, Eaton, Siemens, GE, or similar quality panel
- ✅ At least two adjacent empty slots
- ✅ Existing load is reasonable
This is the cleanest install. We pull the permit, run conduit from the panel to the garage location, mount the charger, and you’re charging that night. Typical timeline: 3–5 hours on-site.
Camp 2: Add a circuit + minor panel work
- ⚠️ 100-amp or 125-amp service, but with manageable existing load
- ⚠️ No empty slots (need tandem breakers or small sub-panel)
- ✅ Acceptable panel brand
Slightly bigger job, sometimes a half-day. We work out whether tandems are panel-rated, whether a sub-panel makes sense, and how to sequence everything.
Camp 3: Panel upgrade required
- ❌ 60, 70, or 100-amp service that’s already at capacity
- ❌ FPE, Zinsco, or Pushmatic panel
- ❌ Multiple high-load appliances and a panel under 200 amps
This is a panel-upgrade-plus-charger combo project. Total install runs a full day, sometimes a day and a half if ComEd needs to coordinate a meter pull. The good news: doing it as a combo is cheaper than doing the panel upgrade later as a separate project — and your home’s overall electrical capacity gets future-proofed for everything else (induction range, heat pump, second EV) at the same time.
For most Naperville homes that need this, a panel upgrade from 100-amp to 200-amp service paired with the EV charger circuit is the right move, and it’s a project we run several times a month.
What to do with this assessment
Take photos of three things while you’re at the panel:
- The brand label on the inside of the door
- The main breaker (the big one, with the amperage stamp visible)
- The full breaker grid (so we can see slot availability)
Send those photos to us and we can usually give you a verbal estimate over email or text — without a site visit. If a site walk is needed (for conduit-routing reasons or because the photos aren’t clear enough), we’ll schedule one and the estimate is free.
Common Naperville scenarios we see every week
A few real patterns that show up over and over:
Pre-1980 home in downtown Naperville with FPE panel: Almost always Camp 3. The good news is the panel was on the list to replace anyway — bundling it with the EV install saves a service call.
1990s split-level in South Naperville with 100-amp Square D: Usually Camp 2. Often we can add the EV circuit with a tandem breaker arrangement if the panel is rated for it. Sometimes a small sub-panel is cleaner.
2005+ two-story in West Naperville with 200-amp panel: Almost always Camp 1. Clean half-day install.
Custom build with 400-amp service: Camp 1 for sure. Usually we’re installing two chargers (one for each garage bay), not one.
Ready for the actual install?
If your self-assessment puts you in Camp 1, Naperville EV charger installation is straightforward — one phone call, free estimate, install scheduled within a week or two depending on charger model and parts availability.
If you’re in Camp 2 or Camp 3, the conversation is the same; we just talk through panel options first and price the combined project. ComEd-eligible rebates apply to either path. Federal Section 30C tax credit eligibility depends on your census tract — we’ll check that during the estimate.
Author
Alexandr Godonoaga — Lead electrician and owner, Cob Services LLC. Illinois-licensed (License #26-00032356). 10+ years of residential electrical work across Naperville and the western suburbs. ICC-certified, ComEd-eligible installer. Connect on LinkedIn → Alexandr Godonoaga